Wednesday 31 August 2016

Winner - August's Charity Kit

Hello friends

Just squeezing this in on the final day of the month!
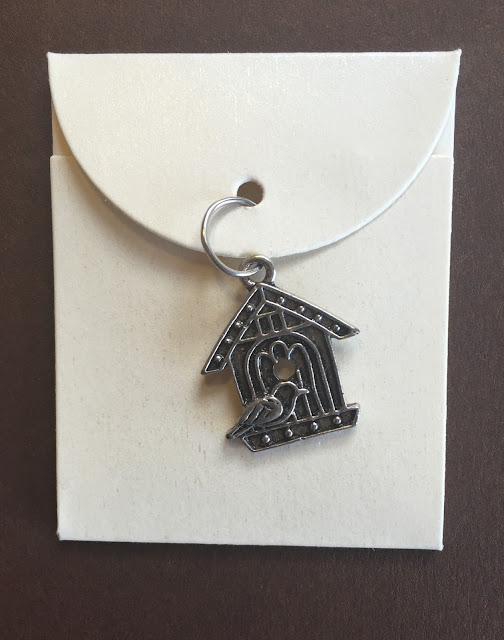
Do you have the winning ticket from August's Charity Kit?


If you have this number you are this month's winner!

Please email me at creativity-continues@outlook.com
with your address details and a goodie bag will be sent straight out to you.

Please look out for September's Charity Kit...announcing soon!

Take care friends.

Monday 29 August 2016

Huge Thanks

Hello friends

It feels very appropriate today to share a thank you card,
in fact a huge thanks for all the lovely comments on my previous post.
I feel very touched to know such lovely people - thank you so much.

My card...it is a combination of Labels 56 and Jubilee Tags. 
I have used Pierced Rectangles for the patterned paper mat 
(Anna Griffin papers) and my trustee A2 Matting Basics.


This is one of those cards that looks like it could take ages...it didn't!


Labels 56 and Jubilee Tags is from the Spellbinders Renaissance line
designed by Stacey Caron.

Today for Bank Holiday Monday I'm cooking - it has been a while
since I've been home to do a roast dinner, so on a very warm day...I'm doing that!

Take care friends - have a brilliant week.


Saturday 27 August 2016

He is twenty!

Hello friends

Today a non-crafty post...
This week that youngest boy of mine turned 20, wow!
All birthdays are milestones but I have to say this one has made me reflective.
It has been a turbulent few years with Elliott's illness.
He is not truly not out of the woods, we have been warned his tumour could grow
back at any point.  To keep check it is six monthly MRI scans,
a cocktail of drugs every day along with lots of injections -
I'm really good at wielding a needle!

But having said all that we do not dwell, we try to make light of all the bad stuff
with our sense of humour and remember things could have been so much worse.
If his illness had gone undetected any longer he would not have seen his
20th birthday. Always good to count your blessings.

 I have a unique relationship with Elliott, we spend a lot of time together -
for those of you who don't know - Elliott now runs Hope and Chances Creativity,
it has enabled me to fully focus on my Ambassador role with Spellbinders
and some TV work.  We do share a section of the craft cabin and
we discuss products and for a boy of 20 he knows an awful lot about craft!
(He is perhaps not so good at blogging...I've mentioned that a few times!)

Today's post also needs to include my eldest boy - Mitchell.
I miss him terribly now he has left home - he now lives and works in Woking.
I can remember thinking I would never miss his mess and all the washing but
nowadays I crave the odd mug and plate left on the lounge floor!
I'm delighted he comes back home to visit often and this week
we got to go out for a lunch together, the three of us again.
Yes they dwarf me now!

So, a non crafty post but I do use my blog as a diary and thought it
would be nice to post a heartfelt entry.

And also a message to everyone ...advice we all know but sometimes
lose sight of and need a gentle reminder -
never take anything/anyone for granted, life can change in an instant,
don't wait - if you want something go for it and beyond everything -
make the most of every day -
(that means a glass of wine and chocolate whenever you like too!)

Take care friends and have a brilliant Bank Holiday weekend.


Friday 26 August 2016

Friday Die Day


Hello friends

This week I am sharing with you Lace and Frills.
A two piece die set with outer frame and a solid decorative embossing inset.

The measurements are:
Inset: 5.625 in 
Border: 5.875 in 

This is how it looks cut/embossed.


Because the embossing is so beautiful I feel it does the work for you.
I added a strip of white lace and affixed this to my card front.


My embellishments are simple flowers and leaves coloured with distress ink,
a stamped sentiment die cut with A2 Matting Basics.


The finished card.


Lace and Frills is available from your Spellbinders retailer.
Gorgeous for Wedding and Anniversary cards.

Have a wonderful weekend everyone.
Take care friends.


Wednesday 24 August 2016

Celebrate You Today

Hello friends

Today's card featured on the Scrapbook Adhesives by 3L blog last week.
(I'm just catching up with my blog posts!)
I've used very pretty tissue tape designed by Donna Salazar along with Spellbinders
Labels 56 Decorative Element and Marisa's Bouquet.


There is a step by step tutorial on the Crafty Power Blog here
and always feel free to leave a comment if you wish... :)


It is a certain someone's birthday tomorrow...Elliott's.
So planning a few nice things and no doubt some scrummy things to eat!

Take care friends.


Monday 22 August 2016

Back home from the Lakes

Hello friends

I'm back from The Lakes...the very wet Lakes!
It rained...it poured...it was torrential but the scenery was still beautiful.
View from my hotel room.


And meet my new friend! 
Extremely friendly and thankfully not noisy first thing in the morning.


Had a lovely time demoing - thank you to everyone who came along
to Papermill Direct.  I'm back there in October to teach a workshop
so please look out for details.

Today's crafty offering appeared on the Spellbinders blog last week.
I created a tea light holder using the Venetian Gatefold die.


All the step by step instructions are here, it's fun and easy to make.


Wishing you all a great start to the week, heatwave tomorrow apparently,
best stay indoors and craft!

Take care friends.


Friday 19 August 2016

Friday Die Day

Hello friends
 
This week I am featuring Notched Mini Envelope.
I adore mini envelopes on projects, also handy to pop in a special note
(whether it be written or cash!)
Designed by Tammy Tutterow there are two dies to the set.
 
The approximate measurements are:
 
Envelope: 3.00 x 5.50 in
Insert: 1.75 x 2.25 in
 
This is how they look cut/embossed.
 
 
Once embossed you have your folding lines.

 
I've secured mine and placed a jump ring and charm through the die cut hole.

 
My card design is based on the Spellbinders product packaging,
always a good place to look for inspiration!
I've placed a piece of Anna Griffin - Lovely Layers paper tied with twine
onto an ivory card base.

 
I've then affixed my Notched Mini Envelope to the left hand side and
decorated with mini flower, leaf and sentiment.

 
Applied a little bit of distress ink to the envelope too.


There are other designs of mini envelopes designed by
Tammy Tutterow - Deco Edge and Pointed - all available from your
Spellbinders retailer.
 
I'm driving to Kendall, Cumbria today as taking part in
Papermill Direct's Summer Craft Event.
If you live in this beautiful part of the world please pop along.
 
Take care friends, have a smashing weekend!
 

Wednesday 17 August 2016

One Die Wonder!

Hello friends

I'm still in Peterborough at Create and Craft but today thought
I would share Labels 56 Decorative Accent with you all.

I've used mirror card to create a shadow behind the middle die cut
and also with the smallest one raised up the outer edge with 3D Foam Squares
 and inserted pretty paper inside.


A card using just this one set of dies so effectively a 
One Die Wonder! 


I like the edging - reminds me of bubbles!


Take care friends and hope your week is going well,
are you crafting?


Monday 15 August 2016

The International Ambassadors are Blog Hopping

Hello friends

  Some of the Spellbinders International Ambassadors are having an

informal blog hop and this time we have chosen
the Debi Adams collection from Spellbinders.
Debi has designed wonderful dies with coordinating stamps.

I've chosen to use Happy Times to create a simple card.
Consists of two dies and a lovely variety of stamps. 

I cut an aperture in my card front using Standard Circles LG #5. 
 
 
I then stamped 'Best Wishes' but positioned the banner die over 'Wishes' only.

 
Die cut the circle die from gold mirror card and patterned paper circle using
Standard Circles LG #2.

 
By masking off the 'Wishes' I stamped 'Best' at the top of my card above the aperture.
Also placed a strip of matching patterned paper across the bottom section of the card.
Paper is Anna Griffin - Lovely Layers.

 
Simply layered the circles and banner and inserted into the aperture.
Used Crafty Foam Tape for dimension.


For more  inspirational projects please hop along to my fellow
Ambassadors' blogs -  have fun!

Christine Emberson (You are here)
 
Thanks so much for stopping by.
We will be back with more!
 

Friday 12 August 2016

Friday Die Day

Hello friends
 
This week I'm featuring Waterfall One.
This is a die set designed by Tammy Tutterow. 
It enables you to easily create cascading pages.. just like a waterfall!
 
There are two dies within the set and the approximate measurements are:
 
Scallop Edge: 3.60 x 3.10 in
Bracket Edge: 3.75 x 3.10 in
 
This is how they look cut/embossed.

 
There are two decorative edges - bracket and scallop which you can mix and match.
It also inserts two score lines.
I've cut a total of 6 scallop pages and folded along each score line.
 
 
To create the waterfall there is a 'score' line and a 'match' line.
You lay one on top of the other moving the lines down.
I found using Crafty Power Tape did the job perfectly.
I've shown them side by side here purely to demonstrate the alignment -
you obviously layer them on top of each other.
 
 
After six are in place you end up with this.

 
Fold over the top tab and secure at the back for a neat finish.

 
Affix onto your desired base.  I've chosen Anna Griffin paper onto a white base
and ran a piece of ribbon across.

 
You can then decorate as desired.
Classic Squares work very well on each page.
Perfect for mini photos, messages etc.

 
To decorate the front I've used Ferns (love this Die D-Lite set),
a stamped tag and Pretty Petals C.

 
Some close up pics.


Waterfall One is available to purchase from your Spellbinders retailer now,
also check out Waterfall Two - same concept but with
different decorative edges.
 
Take care friends - have a wonderful weekend.
I'm busy creating in my cabin.